
Residential Electrical Safety: Essential Knowledge for North Alabama Homeowners
Electrical deficiencies are responsible for thousands of house fires each year — and many are entirely preventable. MPE Services outlines the critical warning signs, risks associated with outdated wiring and aging panels, and the code requirements that every North Alabama homeowner should understand to keep their property safe.
Electrical system deficiencies are among the most prevalent causes of residential structure fires in the United States, accounting for tens of thousands of incidents and billions of dollars in property damage annually. A significant proportion of these events are attributable to identifiable and addressable conditions — outdated wiring, overloaded circuits, defective panels, and inadequate protective devices. At MPE Services, our licensed electricians serve residential and commercial clients throughout North Alabama with a commitment to system safety, code compliance, and long-term reliability.
Critical Warning Indicators Requiring Immediate Attention
Certain electrical symptoms warrant prompt professional evaluation without delay. These include: lights that flicker or dim without apparent cause; circuit breakers that trip repeatedly under normal load conditions; outlets or switch plates that are warm or discolored; a persistent burning odor without identifiable source; audible buzzing or crackling sounds emanating from walls, panels, or fixtures; and visible sparking at outlets or appliances. Any of these conditions may indicate an imminent fire or shock hazard and should not be deferred.
The Risk Profile of Aging Electrical Infrastructure
A substantial portion of the residential housing stock in North Alabama was constructed during periods when electrical standards were significantly less demanding than those currently in effect. Homes built prior to 1980 may contain knob-and-tube or aluminum branch circuit wiring — both of which present elevated risk profiles when subjected to modern electrical loads. Knob-and-tube systems lack a grounding conductor and are incompatible with today's three-prong devices and appliances. Aluminum wiring, particularly at connection points, is susceptible to oxidation and thermal expansion that can create loose, high-resistance connections — a documented fire hazard. Professional inspection and remediation of these systems is strongly recommended.
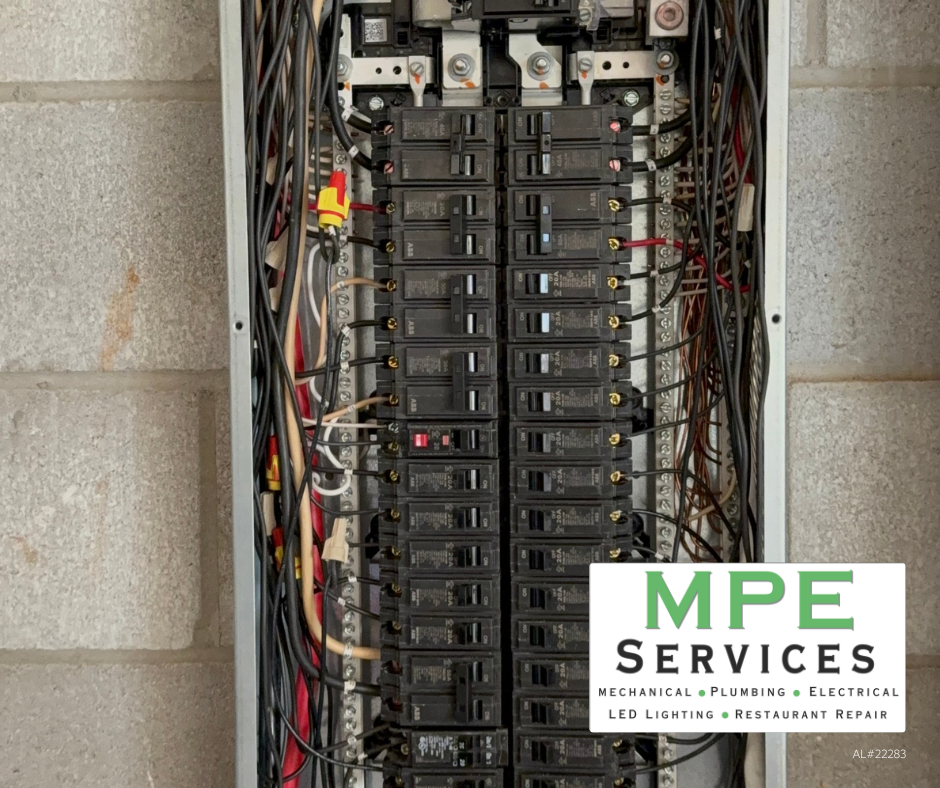
Electrical Panel Condition and Serviceability
The main electrical panel is the central distribution point for all branch circuits in a residential structure. Panels manufactured under certain historical brands — most notably Federal Pacific Electric (Stab-Lok) and Zinsco — have been the subject of extensive safety research documenting elevated failure rates in their overcurrent protection devices. Breakers in these panels may fail to trip under fault conditions, allowing dangerous current levels to persist in branch circuits. If your home contains one of these panel types, a consultation with a licensed electrician is advisable.
Ground Fault Circuit Interrupter (GFCI) Protection
The National Electrical Code (NEC) mandates GFCI protection at all outlets in kitchens, bathrooms, garages, unfinished basements, crawl spaces, outdoor locations, and other areas where moisture exposure is possible. GFCI devices monitor the differential current between the hot and neutral conductors; upon detecting an imbalance indicative of a ground fault, they interrupt the circuit within milliseconds — before a potentially lethal shock can occur. Homes that have not been updated to current GFCI requirements should be brought into compliance as a priority safety measure.
Circuit Capacity and Outlet Availability
Reliance on power strips, multi-outlet adapters, and extension cords as a permanent solution to outlet deficiency is a common and hazardous practice. These devices are designed for temporary use and carry rated load limits that are frequently exceeded in practice. The appropriate solution is the addition of dedicated circuits and properly installed outlets by a licensed electrician — a relatively modest investment that eliminates a persistent safety risk and improves the functionality of living spaces.
Schedule a Professional Electrical Inspection
MPE Services provides comprehensive electrical inspections, panel assessments, GFCI upgrades, wiring evaluations, and emergency electrical repair services throughout Florence, Madison, Huntsville, Birmingham, and North and Central Alabama. To schedule an inspection or request emergency service, call 256-766-9439 or visit callmpe.com.

Whole-Home Standby Generators: A Practical Investment for North Alabama Residences
Severe weather regularly causes extended power outages across North Alabama. A whole-home standby generator, professionally installed by MPE Services, activates automatically within seconds of an outage — keeping your HVAC, appliances, medical equipment, and lighting fully operational without any manual effort.
Power interruptions in North Alabama are a recurring reality. Severe thunderstorm systems, ice accumulation events, and tornado activity regularly result in extended outages — sometimes lasting multiple days — affecting residential and commercial properties across the region. A professionally installed whole-home standby generator represents a substantive infrastructure investment that preserves household comfort, protects sensitive equipment, and eliminates the operational limitations associated with portable generation equipment. MPE Services installs and services Generac and Honeywell standby generator systems throughout Alabama.
Understanding Standby Generator Technology
A whole-home standby generator is a permanently installed, weather-protected power generation unit connected directly to the structure's electrical panel and supplied by an existing natural gas or propane line. Unlike portable generators — which require manual deployment, fuel management, and external wiring — a standby unit monitors incoming utility power continuously. Upon detecting an outage, an integrated automatic transfer switch (ATS) disconnects the structure from the utility grid and initiates generator operation, typically within 10 to 30 seconds. Restoration of utility power triggers automatic switchover and generator shutdown.
System Capacity and Load Planning
Generator sizing is a critical determinant of system performance. An undersized unit will fail to support essential loads; an oversized unit represents unnecessary capital expenditure. MPE Services performs a comprehensive load analysis prior to equipment selection, evaluating the electrical demands of HVAC systems, refrigeration appliances, lighting circuits, sump pumps, medical equipment, and other critical loads. This analysis informs specification of the appropriate generator capacity for each installation.
Risk Mitigation and Asset Protection
Extended power outages create a cascading series of secondary risks that are frequently underestimated. Sump pump failure during storm events can result in substantial basement flooding. Refrigerated and frozen food inventories are compromised within hours. HVAC system inoperability during humid summer conditions accelerates mold development within the building envelope. Electronic equipment and appliances are also vulnerable to damage from power surge events during restoration. Standby generation eliminates these secondary exposure categories.
Critical Application Scenarios
Whole-home generator installations are of particular value in households with medically dependent occupants requiring powered equipment — including oxygen concentrators, CPAP devices, home infusion systems, and powered mobility aids. They are equally important for residences with infants, elderly occupants, or individuals with heat-related medical vulnerabilities. For these households, utility power interruption may represent a direct health risk, not merely a comfort inconvenience.
Professional Installation and Compliance
MPE Services manages the complete installation process, including site assessment, equipment procurement, natural gas or propane line connection, electrical panel integration, automatic transfer switch installation, permit acquisition, and final commissioning. All installations are performed by licensed electricians and comply with applicable local and state codes. Upon completion, our technicians provide a full operational walkthrough and establish a recommended maintenance schedule.
Request a Generator Consultation
To schedule a no-obligation generator consultation for your North Alabama home or business, contact MPE Services at 256-766-9439 or visit callmpe.com. We serve Florence, Muscle Shoals, Madison, Huntsville, Birmingham, and communities throughout North and Central Alabama.
Preventive Plumbing Practices for North Alabama Homeowners: A Professional Guide
Plumbing failures can cause serious structural and financial damage — but most are preventable. From locating your main shutoff valve to protecting pipes during cold snaps, MPE Services walks North Alabama homeowners through the essential practices that keep plumbing systems reliable year-round.
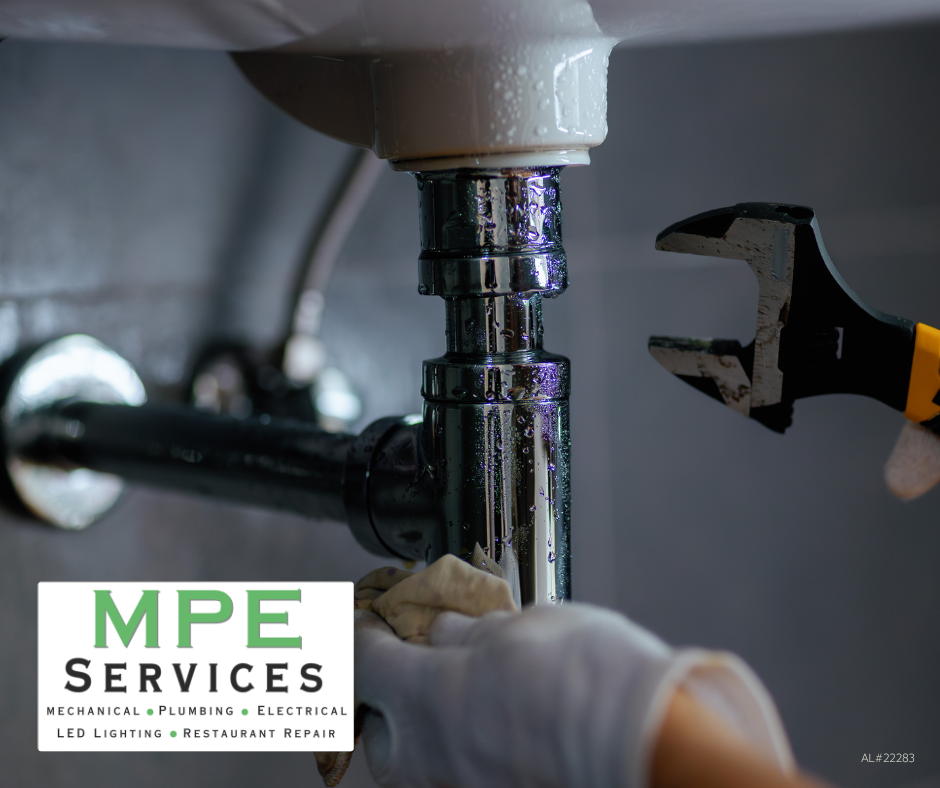
Residential plumbing failures rank among the most financially and structurally damaging events a homeowner can experience. Water intrusion — whether from pipe failure, fixture malfunction, or water heater rupture — can result in significant structural damage, mold proliferation, and costly remediation. At MPE Services, our licensed plumbers work throughout North Alabama addressing both emergency conditions and long-term system vulnerabilities. The guidance below reflects best practices for maintaining plumbing system integrity and avoiding preventable losses.
Locate and Verify Access to Your Main Water Shutoff Valve
Every household member of appropriate age should be able to locate and operate the main water shutoff valve without assistance. In the event of a pipe rupture, appliance failure, or visible leak, rapid water shutoff is the single most effective action available prior to professional arrival. Main shutoff valves are typically located near the water meter, in a crawl space, or along the perimeter of the home's foundation. Periodically exercise the valve to confirm it operates correctly.
Recognize the Early Indicators of System Deterioration
Reduced water pressure at multiple fixtures, persistent slow drainage, discoloration of hot or cold water supply, visible moisture staining on ceilings or walls, and elevated water meter readings during periods of non-use are all early warning indicators of underlying plumbing deficiencies. Timely professional evaluation of these conditions consistently results in lower repair costs than addressing failures after escalation.
Implement Freeze Protection Protocols During Cold Weather Events
While North Alabama's winters are comparatively mild, below-freezing temperatures occur with regularity — and unprotected supply lines in unconditioned spaces such as crawl spaces, garages, and exterior wall cavities are vulnerable to freeze damage. Thermal insulation of exposed piping, combined with allowing minimal continuous flow through at-risk fixtures during extreme cold events, provides reliable protection against freeze-related pipe failures.
Schedule Periodic Water Heater Assessments
Conventional tank-style water heaters carry a rated service life of 8 to 12 years. As units approach or exceed this threshold, the risk of tank failure — with potentially significant water release — increases substantially. Early warning signs include discoloration in the hot water supply, sediment sounds during heating cycles, inconsistent hot water availability, and visible corrosion at connections or the tank body. MPE Services can assess current condition and provide objective repair-versus-replacement guidance.
Consider a Whole-Home Water Filtration Solution
Municipal and well water supplies throughout North Alabama can carry elevated levels of minerals, sediment, and treatment byproducts that accelerate internal pipe corrosion and reduce the efficiency of water-using appliances. A whole-home filtration system installed at the point of entry addresses these contaminants comprehensively, extending the service life of plumbing infrastructure and improving water quality at every fixture and appliance in the structure.
Contact MPE Services for Professional Plumbing Services
MPE Services provides licensed plumbing services for residential and commercial clients throughout North Alabama, including Florence, Muscle Shoals, Madison, Huntsville, and Decatur. We offer same-day service and 24/7 emergency response for urgent conditions. To schedule service, call 256-766-9439 or visit callmpe.com.
5 Signs Your HVAC System Requires Attention Before Alabama's Summer Season
North Alabama summers put enormous strain on residential HVAC systems. Before peak cooling season arrives, learn the five key warning signs that your system may need professional service — from extended run cycles and unusual noises to rising energy bills and uneven temperatures throughout your home.
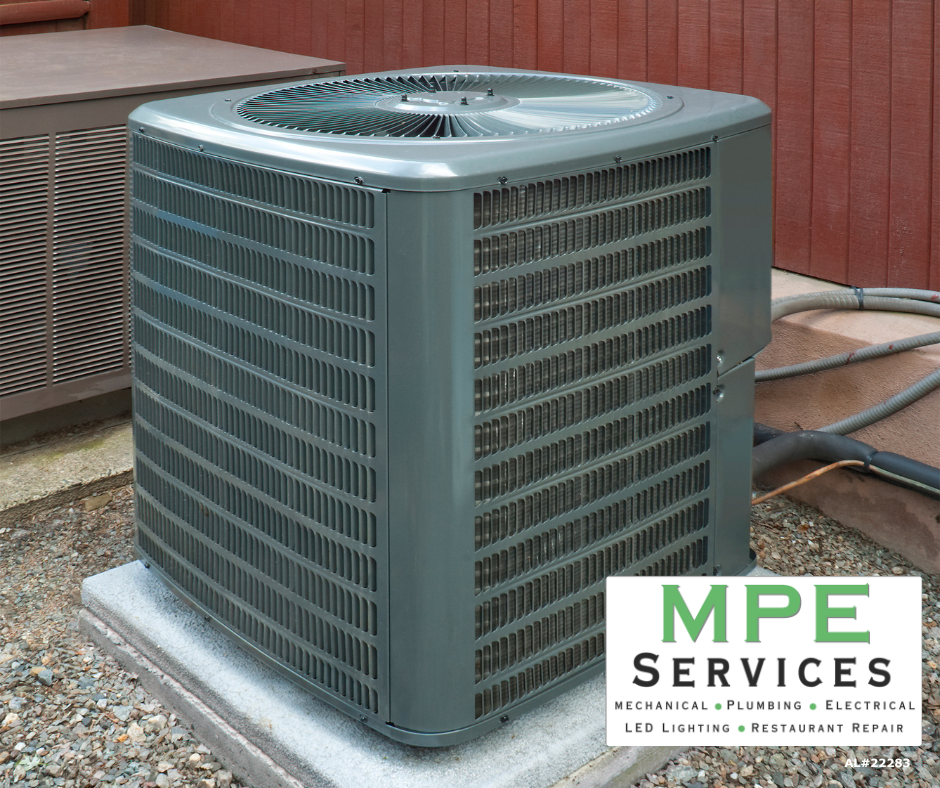
North Alabama summers present significant challenges for residential and commercial HVAC systems. With temperatures frequently exceeding 95°F and humidity levels that compound heat stress on mechanical equipment, a failing air conditioning system is not merely an inconvenience — it is a safety concern. At MPE Services, our certified HVAC technicians recommend proactive evaluation before peak cooling season arrives. The following indicators suggest your system warrants professional attention.
1. Extended Cooling Cycles Without Achieving the Set Temperature
When an air conditioning system operates continuously but fails to reach the thermostat's target temperature, the underlying cause may include refrigerant loss, a fouled evaporator or condenser coil, or a compressor operating outside its rated efficiency range. In North Alabama's climate, a system that cannot maintain adequate cooling becomes a liability as summer temperatures intensify. Early diagnosis and remediation are considerably more cost-effective than emergency replacement during peak demand.
2. Atypical Mechanical Sounds During System Operation
A properly functioning HVAC system operates with minimal acoustic disruption. Banging, grinding, screeching, or persistent clicking sounds during startup or steady-state operation are indicative of mechanical wear or component failure — including loose mounting hardware, deteriorating fan bearings, failing contactors, or compressor degradation. These conditions do not resolve without intervention and typically worsen with continued use.
3. Unexplained Increases in Energy Consumption
A statistically significant increase in monthly energy costs, absent any corresponding change in usage patterns or utility rate structures, is a reliable indicator of declining system efficiency. As HVAC components degrade, the system must expend greater energy to achieve the same thermal output — a cycle that accelerates equipment wear while increasing operating expenses. Scheduled maintenance can restore efficiency and reduce billing anomalies.
4. Inconsistent Thermal Distribution Across Occupied Space
Temperature variance between rooms or zones within a structure may indicate ductwork deterioration, thermostat calibration issues, inadequate refrigerant charge, or a system that has been improperly sized for the building's current load requirements. Unaddressed, these imbalances reduce occupant comfort and impose unnecessary strain on the mechanical system.
5. Absence of Preventive Maintenance Within the Prior 12 Months
Industry standards and manufacturer warranties typically require annual preventive maintenance. A comprehensive MPE Services HVAC inspection includes coil cleaning, refrigerant level verification, electrical connection inspection, capacitor and contactor testing, condensate drain evaluation, and blower motor assessment. Systems maintained on schedule demonstrate measurably longer service lives and fewer unplanned failures.
Schedule Your Pre-Season HVAC Evaluation
MPE Services provides professional HVAC inspection, maintenance, and repair services throughout Florence, Madison, Huntsville, Decatur, and the broader North Alabama region. To schedule a pre-season evaluation, contact our service team at 256-766-9439 or request an appointment online at callmpe.com.